Realtek audio driver Windows 11: Yeah, so you’re dealing with sound issues on your Windows 11 machine? It’s a super common problem, especially with Realtek audio. Whether it’s crackling, no sound at all, or just general weirdness, we’ve got you covered. This guide dives deep into installing, troubleshooting, and optimizing your Realtek audio, from basic fixes to some more advanced tweaks.
Table of Contents
Get ready to ditch the audio headaches and get back to rocking out (or whatever sounds you’re into).
We’ll walk you through everything from the simple stuff—like actually installing the darn driver correctly—to more advanced techniques for troubleshooting persistent audio problems and maximizing your sound quality. We’ll cover different installation methods, compatibility issues, and even how to roll back a driver if things go south. Think of this as your one-stop shop for all things Realtek audio on Windows 11.
Driver Installation Procedures
Okay, so you’ve got your shiny new Realtek audio driver and you’re ready to get that sweet, sweet audio goodness flowing. Installing it on Windows 11 is usually pretty straightforward, but there are a couple of ways to do it, and some things that can go wrong. Let’s break it down.
This section details the steps for installing the Realtek Audio Driver on Windows 11, covering both the .exe installer method and manual installation, along with troubleshooting common issues. We’ll use a table to make the process super clear.
Realtek Audio Driver Installation Using the .exe Installer
This is generally the easiest method. Download the .exe installer from the Realtek website or your motherboard manufacturer’s site. Double-clicking the file should launch the installer automatically. The process is largely self-, but here’s a breakdown with a visual representation (imagine screenshots here – descriptions provided below).
| Step | Action | Screenshot Description | Troubleshooting Notes |
|---|---|---|---|
| 1 | Double-click the downloaded .exe file. | A window appears with the Realtek Audio Driver installer logo and a progress bar. Expect to see options like “Next,” “Install,” and “Cancel.” | If the file doesn’t run, check your antivirus software; it might be flagging the installer as a threat (false positive is possible, but temporarily disabling is a quick test). Ensure you have administrator privileges. |
| 2 | Follow the on-screen prompts. | You’ll likely see a license agreement, a choice of installation location (usually default is fine), and a confirmation screen. | Read the license agreement! If you encounter an error during the installation, check your system resources (RAM, storage space). A reboot might be necessary. |
| 3 | Wait for the installation to complete. | A progress bar indicates the installation’s progress. Once complete, a confirmation window appears. | If the installation hangs or freezes, try running the installer as administrator. If the problem persists, consider a system file checker scan (sfc /scannow in Command Prompt as administrator). |
| 4 | Restart your computer. | A prompt will likely appear suggesting a restart. | This step is crucial for the driver to take effect. If you skip this, audio may not work correctly. |
Manual Realtek Audio Driver Installation
Manual installation involves extracting the driver files and installing them through Device Manager. This is useful if the .exe installer fails or if you need to install a specific driver version. It requires a bit more technical know-how.
First, you’ll need to download the driver package, usually a compressed file (.zip or .rar). Extract the contents to a folder you can easily access. Then, follow these steps (again, imagine descriptive screenshots here):
| Step | Action | Screenshot Description | Troubleshooting Notes |
|---|---|---|---|
| 1 | Open Device Manager. | The Device Manager window will show a list of hardware devices. | Search for “Device Manager” in the Windows search bar. |
| 2 | Locate “Sound, video and game controllers.” | Expand this section to reveal your audio device. | It might be listed as “High Definition Audio Device” or similar if the driver isn’t installed. |
| 3 | Right-click your audio device and select “Update driver.” | A menu will appear with options like “Search automatically for drivers” and “Browse my computer for drivers.” | Choosing “Search automatically” will try to find a driver online. If that fails, use “Browse my computer.” |
| 4 | Browse to the extracted driver folder. | Navigate to the folder containing the extracted driver files. | The correct folder will usually contain .inf files. |
| 5 | Select the driver and follow the on-screen instructions. | Windows will install the driver. A progress bar will show the installation progress. | If Windows can’t find a suitable driver, double-check you’ve extracted the correct files and are in the right folder. Ensure you have the correct driver for your operating system (64-bit or 32-bit). |
| 6 | Restart your computer. | A prompt may appear suggesting a restart. | Again, restarting is vital for the changes to take effect. |
Driver Compatibility Issues
Realtek audio drivers, while generally reliable, can sometimes clash with specific Windows 11 versions or hardware setups. These compatibility problems can manifest in various ways, from subtle audio glitches to complete audio failure. Understanding potential issues and their solutions is crucial for a smooth user experience. This section explores common compatibility problems, error messages, and affected hardware configurations.Compatibility problems primarily stem from the intricate relationship between the driver’s code, the operating system’s core audio components, and the specific hardware involved (sound card, motherboard audio chipset, etc.).
A mismatch in any of these elements can lead to instability or malfunction. Factors like outdated drivers, conflicting software, and hardware limitations also play significant roles.
Common Realtek Audio Driver Error Messages and Solutions
Troubleshooting Realtek audio driver issues often involves identifying specific error messages. These messages provide clues about the underlying problem. Knowing how to interpret these messages and take appropriate action is key to resolving the issue.
- Error: “No audio devices are installed.” This often points to a driver installation problem. The solution involves reinstalling the correct Realtek driver, ensuring it’s compatible with your Windows 11 version and hardware. Sometimes, a system restart after installation is necessary.
- Error: “Device driver software was not successfully installed.” This indicates a potential driver corruption or incompatibility. Try uninstalling the current driver through Device Manager, restarting your computer, and then reinstalling the latest driver from Realtek’s official website. Be sure to select the driver specifically designed for your Windows 11 version and hardware model.
- Error: “Windows cannot verify the digital signature for the drivers.” This usually means you’re trying to install an unsigned or untrusted driver. Only install drivers from trusted sources, such as the Realtek official website. For security, Windows 11 may prevent installation of unsigned drivers. Temporarily disabling driver signature enforcement (a risky option, only use if absolutely necessary and you understand the implications) might be required, but it should be re-enabled afterwards.
- Audio distortion or crackling: This could indicate driver conflicts, outdated drivers, or even hardware issues. Try updating the driver, uninstalling and reinstalling, checking for conflicting audio software, or adjusting audio settings within Windows. If the problem persists, consider checking your hardware for any physical damage or loose connections.
Hardware Configurations Prone to Compatibility Issues
Certain hardware configurations are more susceptible to Realtek audio driver compatibility problems than others. These often involve less common or older hardware components that haven’t been fully tested with the latest drivers.Some examples include older motherboards with integrated Realtek audio chipsets that are not fully supported by the newest Windows 11 updates. Another example is using a sound card from a different manufacturer with a Realtek driver intended for an integrated chipset.
In such cases, compatibility issues might arise due to differing hardware specifications and driver expectations. Using custom-built PCs with unusual hardware combinations can also increase the risk of driver conflicts. It’s important to always check the driver’s specifications to ensure compatibility with your specific hardware before installation.
Sound Troubleshooting Techniques: Realtek Audio Driver Windows 11
Okay, so you’ve installed your Realtek audio driver on Windows 11, and now… crickets? Or worse, a cacophony of static and crackling? Don’t panic! Sound problems are surprisingly common, even with a fresh driver install. Let’s get your audio back on track. This section Artikels some typical issues and how to fix them.
After installing the Realtek audio driver, several sound-related problems might occur. These problems stem from various sources, including driver conflicts, hardware malfunctions, or incorrect system settings. Understanding the root cause is key to effective troubleshooting.
No Sound Output, Realtek audio driver windows 11
This is the classic “uh oh” moment. You’ve got your headphones plugged in, your speakers are on, but nothing’s happening. Here’s how to diagnose and solve this:
- Check Volume Levels: Sounds obvious, but double-check the volume controls in the system tray (bottom-right corner of your screen), and ensure your volume isn’t muted. Also, check the volume on your speakers or headphones themselves.
- Verify Device Selection: Make sure your Realtek audio device is selected as the default playback device. Go to your sound settings (search for “Sound” in the Windows search bar), navigate to the “Playback” tab, and right-click on your Realtek device to set it as default.
- Restart Your Computer: A simple reboot can often resolve temporary glitches. This forces Windows to re-establish connections and can clear up minor software issues.
- Check Device Manager: Open Device Manager (search for it in the Windows search bar), expand “Sound, video and game controllers,” and look for any yellow exclamation marks next to your Realtek audio device. A yellow mark indicates a driver problem. Right-click the device and select “Update driver” to try reinstalling or finding a newer version.
- Check Cable Connections: Make sure all cables (headphone, speaker) are securely connected to both your computer and audio device.
Distorted Audio
Instead of clear sound, you’re getting a fuzzy, unpleasant mess. This usually points to a driver or hardware issue.
- Update or Reinstall the Driver: Sometimes, a faulty or outdated driver is the culprit. Try updating or reinstalling your Realtek audio driver from the Realtek website or Device Manager (as described above).
- Check for Conflicting Applications: Some applications might interfere with audio processing. Close any unnecessary programs running in the background to see if this improves the sound quality.
- Adjust Audio Enhancements: Realtek audio drivers often include audio enhancements (like equalization or surround sound). Try disabling these temporarily to see if they are causing the distortion. You’ll find these settings in the Realtek Audio Console (usually accessible via the system tray).
- Hardware Issues: If the problem persists, it could be a problem with your speakers or headphones. Try testing with different audio devices to rule out a hardware fault.
Crackling or Popping Sounds
This annoying sound is often caused by interference or resource conflicts.
- Check for Background Processes: High CPU or memory usage by other applications can lead to audio crackling. Close any resource-intensive programs running in the background.
- Update Windows: Ensure your Windows operating system is up-to-date. Outdated operating systems can sometimes have compatibility issues with audio drivers.
- Adjust Sample Rate and Bit Depth: In the Realtek Audio Console, try adjusting the sample rate and bit depth settings. Experiment with different settings to find one that minimizes crackling. Higher sample rates and bit depths generally improve audio quality, but they can also increase the load on your system.
- Check Power Settings: Power saving modes can sometimes interfere with audio performance. Make sure your computer isn’t set to a power saving mode that limits performance.
Driver Update Methods
So, you’re ready to update your Realtek audio drivers, huh? Good call! Getting the latest drivers can fix sound problems, add new features, and generally improve your audio experience. But how do you actuallydo* it? There are a few different ways, each with its own pros and cons. Let’s break them down.Updating your Realtek audio drivers is like choosing your weapon in a video game – each method has its strengths and weaknesses, and the best choice depends on your tech skills and comfort level.
Windows Update
Windows Update is the easiest method. It’s built into Windows 11, so it’s super convenient. Windows automatically checks for and installs updates, including drivers, in the background. However, it doesn’t always have the absolute latest drivers, and sometimes the updates it provides might not be perfectly optimized for your specific hardware. Think of it as the “safe” option – reliable, but not always the most powerful.Advantages: Simple, automatic, requires minimal user interaction.Disadvantages: May not include the very latest drivers, updates might not be perfectly tailored to your specific hardware.
Realtek Website
Going straight to the source – the Realtek website – offers the most up-to-date drivers. You’ll need to navigate to their support section, find your specific audio device model, and download the correct driver. This is great if you want the absolute best performance and the newest features, but it requires a bit more technical know-how and can be time-consuming if you’re not sure what you’re doing.
It’s the “power user” method.Advantages: Access to the newest drivers, often includes additional features or bug fixes not found in Windows Update.Disadvantages: Requires more technical knowledge, can be time-consuming to find the correct driver, risk of downloading incorrect drivers if you’re not careful.
Device Manager
Device Manager is a built-in Windows tool that lets you manage all your hardware, including your audio devices. You can use it to update your drivers manually. It’s a middle ground between the simplicity of Windows Update and the control of the Realtek website. You’ll still need to search for updates, but it’s all within the familiar Windows environment.Advantages: More control than Windows Update, easier than downloading directly from the Realtek website.Disadvantages: Might not always find the latest drivers, requires some basic technical knowledge.
Comparison of Driver Update Methods
| Method | Ease of Use | Driver Version | Time Required |
|---|---|---|---|
| Windows Update | Very Easy | Usually up-to-date, but not always the latest | Minimal |
| Realtek Website | Moderate | Latest available version | Moderate to High |
| Device Manager | Easy | Potentially the latest, depending on availability | Low to Moderate |
Driver Rollback Procedures
Okay, so your Realtek audio driver update went sideways? Don’t panic! Windows 11 has a built-in mechanism to revert to a previous version, essentially undoing the update. This is a lifesaver if the new driver causes audio glitches, crashes, or just plain doesn’t work.Rolling back a driver is a relatively safe process, but it’s always wise to understand the potential implications before diving in.
While it can fix problems caused by a faulty update, it also means you might miss out on any bug fixes or performance improvements the new driver offered. Think of it like this: sometimes a new software update is like getting a new car – shiny and exciting, but occasionally it needs a recall. A rollback is like getting your old car back, which you know works, at least for now.
Rollback Steps
The steps for rolling back your Realtek audio driver are pretty straightforward. However, remember that the exact visual appearance of your Windows settings might vary slightly depending on your Windows version and personalization settings. The core functionality remains consistent.
| Step | Action | Description | Screenshot Description |
|---|---|---|---|
| 1 | Open Device Manager | Search for “Device Manager” in the Windows search bar and select it. | Shows a Windows search bar with “Device Manager” typed in, and the Device Manager app highlighted in the search results. The Device Manager window will have a list of hardware categories on the left. |
| 2 | Locate Sound, video and game controllers | Expand the “Sound, video and game controllers” section to reveal the listed audio devices. | Shows the Device Manager window with the “Sound, video and game controllers” section expanded, revealing a list of audio devices, likely including “Realtek High Definition Audio”. |
| 3 | Right-click Realtek Audio Driver | Right-click on your Realtek High Definition Audio driver (or similar naming). | Shows a screenshot of the mouse cursor hovering over the Realtek High Definition Audio driver entry, with a right-click context menu about to appear. |
| 4 | Select Properties | Select “Properties” from the context menu. | Shows the context menu with “Properties” highlighted. |
| 5 | Navigate to Driver Tab | In the Properties window, click the “Driver” tab. | Shows the Realtek High Definition Audio Properties window with the “Driver” tab selected. |
| 6 | Click Roll Back Driver | Click the “Roll Back Driver” button, if available. If not available, other troubleshooting steps are necessary. | Shows the “Driver” tab with the “Roll Back Driver” button highlighted. |
| 7 | Follow On-Screen Instructions | Follow any on-screen prompts to complete the rollback process. Your computer might restart. | Shows a generic Windows dialog box indicating the rollback process is in progress or complete, and potentially a restart prompt. |
Advanced Audio Configuration Options
Okay, so you’ve got your Realtek audio driver installed and working, but let’s dive into the juicy stuff – tweaking those audio settings to get the absolute best sound experience. The Realtek Audio Console is where the magic happens, offering a surprising amount of customization beyond just basic volume control. Think of it as your personal audio command center.
The Realtek Audio Console provides access to a range of advanced settings that allow you to fine-tune your audio experience. These settings go beyond the basic volume controls and allow for a highly personalized audio profile. The interface may vary slightly depending on your Realtek driver version, but the core functionalities remain consistent. You’ll typically find options for managing surround sound, adjusting equalization (EQ) settings, and configuring microphone input levels and effects.
Surround Sound Configuration
Surround sound emulates a multi-speaker setup, creating a more immersive and spatially accurate audio experience. Realtek often offers several virtual surround sound modes, like 5.1 or 7.1, even if you only have stereo speakers or headphones. These modes process the audio signal to create the illusion of sound coming from multiple directions. Within the console, you’ll typically find a dropdown menu or selection of presets to choose the desired surround sound mode.
Selecting a mode often involves choosing between different algorithms designed to optimize the audio for various speaker configurations or headphone types. For example, you might choose a setting optimized for gaming headphones or home theater speakers. Experimentation is key to finding the best setting for your setup and personal preferences.
Equalizer Settings
The equalizer (EQ) allows you to adjust the balance of different frequencies in your audio output. This lets you boost or cut bass, treble, and mid-range frequencies to personalize your sound. Realtek’s EQ typically offers a graphical interface with sliders or a band selection, allowing you to manually adjust the frequency response. Presets are often available (like “Rock,” “Pop,” “Classical”) for quick adjustments, or you can create your own custom EQ profiles for different types of audio content.
For instance, you might boost the bass for music but reduce it for clear dialogue in movies.
Microphone Settings
The Realtek Audio Console also provides options for adjusting your microphone input. You can typically control the microphone’s input level, reducing or increasing its sensitivity. Some Realtek drivers also include noise reduction or echo cancellation features to improve the clarity of your voice during calls or recordings. These features use algorithms to filter out background noise or eliminate echoes that might interfere with the microphone’s signal.
Experiment with the different noise reduction settings to find the optimal balance between noise reduction and preserving the natural sound of your voice. It’s also possible to select the microphone input source, if you have multiple microphones connected.
Remember to always test your audio settings after making adjustments to ensure the changes are to your liking. The Realtek Audio Console provides a user-friendly interface for exploring these advanced options, so don’t hesitate to experiment and find the perfect audio configuration for your needs.
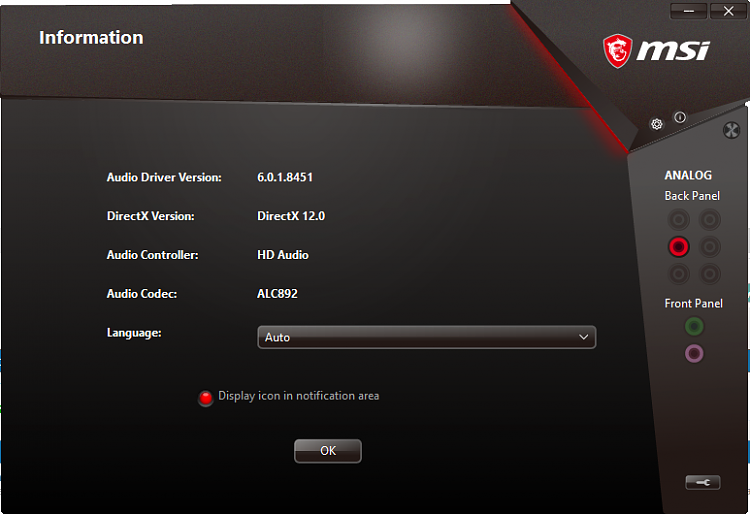
Realtek Audio Console Features
The Realtek Audio Console is a handy utility that lets you tweak your audio settings beyond the basic Windows controls. It provides granular control over various aspects of your audio experience, from speaker configuration to environmental noise cancellation. Understanding its features can significantly improve your sound quality and personalize your audio setup.
Accessing the Realtek Audio Console usually involves finding its icon in your system tray (the area near the clock on your taskbar). It might look like a speaker icon or a Realtek logo. A right-click on the icon will typically bring up a menu allowing you to open the console. If you can’t find it there, you might need to search for “Realtek Audio Console” in your Windows search bar.
Speaker Configuration
This section allows you to choose your audio output device and configure its speaker setup. You can select from various configurations, such as stereo, 5.1 surround sound, or 7.1 surround sound, depending on your speakers and sound card capabilities. The console often provides a visual representation of your speaker layout to help you make the correct selection. Incorrect configuration can result in audio playing from the wrong speakers or channels.
For example, if you have a 5.1 system but select stereo, you’ll only hear audio from the front left and right speakers.
Environmental Noise Cancellation
This feature attempts to reduce background noise during audio input (microphone). It’s particularly useful for video conferencing or voice recording in noisy environments. The effectiveness varies depending on the type and level of background noise. Realtek often provides several presets or customizable levels for this feature. For instance, you might choose between “Low,” “Medium,” and “High” noise reduction, or adjust a slider to fine-tune the level of noise cancellation.
Overly aggressive noise cancellation can sometimes also reduce the clarity of your voice.
Equalizer
The equalizer allows you to adjust the frequency balance of your audio output. It provides sliders or presets to boost or cut specific frequency ranges (bass, midrange, treble). This allows you to tailor the sound to your preferences or compensate for deficiencies in your speakers or listening environment. For example, you might boost the bass if your speakers lack low-frequency response or cut the treble if you find the sound too harsh.
Presets like “Rock,” “Pop,” or “Classical” offer quick adjustments for different musical genres.
| Feature | Description | Access Method | Example Screenshot Description |
|---|---|---|---|
| Speaker Configuration | Selects audio output device and speaker setup (stereo, 5.1, 7.1, etc.). | Usually found under a “Speakers” or “Devices” tab. | A graphic showing different speaker icons (front left, front right, center, subwoofer, etc.) with checkboxes or dropdown menus to select active speakers. A visual representation of speaker placement may also be present. |
| Environmental Noise Cancellation | Reduces background noise during microphone input. | Often located in a “Microphone” or “Input” tab. | A slider to adjust the noise reduction level (Low, Medium, High) or a dropdown menu with preset options. A small graphic or text indicator might show the current noise reduction level. |
| Equalizer | Adjusts the frequency balance of audio output. | Typically found under an “Equalizer” or “Sound Effects” tab. | Multiple sliders representing different frequency bands (bass, midrange, treble) with numerical values indicating the level of boost or cut. Presets (e.g., “Rock,” “Pop”) might also be available as buttons. |
Performance Optimization
Getting the best audio experience from your Realtek audio driver in Windows 11 involves more than just installation. Optimizing performance ensures crisp, clear sound with minimal latency and avoids frustrating dropouts. This section will explore techniques to achieve peak audio performance.Optimizing your Realtek audio driver’s performance involves addressing potential bottlenecks in your system that can impact audio quality. These bottlenecks can stem from various sources, including conflicting software, resource limitations, and improper configuration settings.
By understanding these potential issues and applying the appropriate solutions, you can significantly enhance your audio experience.
Resource Management
Effective resource management is crucial for optimal audio performance. High CPU usage from other applications can compete with the audio driver for processing power, leading to audio glitches or latency. Closing unnecessary background processes and monitoring CPU usage while playing audio can help identify resource conflicts. For example, if you’re experiencing audio issues while gaming, closing unnecessary browser tabs or applications can free up CPU resources for smoother audio playback.
Additionally, ensuring sufficient RAM availability prevents the system from relying on slower virtual memory, which can negatively affect audio processing.
Driver Settings
Realtek’s audio console offers various configuration options that can directly impact audio performance. Experimenting with different sample rates and bit depths can affect both audio quality and resource usage. Higher sample rates and bit depths generally provide better audio fidelity but consume more processing power. Finding the optimal balance between quality and performance depends on your system’s capabilities and your individual needs.
For instance, setting the sample rate to 44.1kHz instead of 192kHz might improve performance without significantly sacrificing audio quality on a less powerful system. Similarly, adjusting the buffer size in the Realtek audio console can influence latency. A smaller buffer size reduces latency but increases the risk of audio dropouts, whereas a larger buffer size increases latency but improves stability.
Finding the right balance depends on your application (e.g., gaming requires lower latency, while music production might prioritize stability).
Exclusive Mode and Other Software Interference
Many applications use “exclusive mode” to access audio devices directly, potentially causing conflicts with other programs. Disabling exclusive mode in your audio settings can resolve audio interference issues between different applications. Additionally, certain software can interfere with the Realtek driver, causing unexpected audio behavior. Identifying and disabling or uninstalling such software can improve audio stability. For example, some third-party audio enhancement tools might clash with the Realtek driver’s internal processing, leading to audio artifacts or distortion.
Carefully reviewing installed software and identifying potential conflicts is a key step in performance optimization.
Hardware Considerations
While software optimization is crucial, hardware limitations can also affect audio performance. An outdated or low-quality sound card can introduce noise or limit the achievable audio quality. Similarly, insufficient bandwidth on your system’s USB or other connections can affect audio streaming from external devices. Consider upgrading your hardware if necessary to address these limitations. For example, if you’re using an older USB sound card, upgrading to a newer, higher-quality card with a more current interface (like USB 3.0 or higher) can drastically improve audio performance and reduce latency.
Common Errors and Solutions
Troubleshooting Realtek audio driver issues can be frustrating, but understanding common problems and their solutions can save you time and headaches. This section Artikels frequently encountered errors and provides step-by-step solutions to get your audio back up and running smoothly. Remember to restart your computer after implementing any solution.
| Error Description | Cause | Solution | Additional Notes |
|---|---|---|---|
| No Sound | Incorrectly installed or corrupted driver, muted speakers/microphone, faulty hardware, incorrect audio output device selected. | Check volume levels, ensure speakers/headphones are plugged in correctly and selected as the default output device in the Sound settings. Reinstall or update the Realtek audio driver. Run the Windows audio troubleshooter. Check device manager for any errors related to your audio devices. | If hardware is suspected, try different speakers/headphones. A blown speaker is a common cause. |
| Distorted or Crackling Sound | Driver incompatibility, outdated driver, conflicting software, hardware issues (e.g., damaged audio jack, interference). | Update the Realtek audio driver to the latest version. Check for conflicting software that might be interfering with audio processing. Try different audio output devices. Run the Windows audio troubleshooter. | Consider reinstalling Windows as a last resort if all else fails. Check for physical damage to audio cables and connectors. |
| Microphone Not Working | Microphone muted, incorrect input device selected, driver issues, hardware failure. | Check microphone mute button, ensure the microphone is plugged in correctly and selected as the default input device. Reinstall or update the Realtek audio driver. Check device manager for errors. Test the microphone on a different device to rule out hardware failure. | Check microphone privacy settings in Windows. Ensure the correct microphone is selected in applications. |
| Audio Device Not Recognized | Faulty hardware, driver installation problems, BIOS settings. | Check all physical connections. Reinstall the Realtek audio driver. Check Device Manager for any yellow exclamation marks indicating problems. Update the BIOS (proceed with caution, as this is advanced). | Consult your motherboard’s manual for BIOS update instructions. Incorrect BIOS settings can sometimes prevent the OS from recognizing hardware. |
Alternative Audio Drivers
Okay, so Realtek’s giving you grief? Totally understandable. Sometimes, the default driver just isn’t the best fit, and you might need to explore other options for a smoother audio experience. Let’s dive into some alternatives.Switching to a different audio driver can significantly impact your sound quality, especially if you’re dealing with specific issues like crackling, popping, or compatibility problems with certain applications or hardware.
However, it’s important to weigh the pros and cons before making a change. Sometimes, a fresh install of the Realtek driver or tweaking its settings might be all you need.
Comparison of Alternative Audio Drivers
Choosing the right alternative depends on your specific needs and system configuration. There isn’t a one-size-fits-all solution, but here’s a look at some popular options and their characteristics. Keep in mind that driver availability and compatibility can vary depending on your operating system and sound card model.Several alternatives exist, including drivers directly from your motherboard or sound card manufacturer (if different from Realtek).
So, I’m totally wrestling with this Realtek audio driver issue on my Windows 11 machine – it’s a nightmare! It’s got me thinking about how much easier life would be if managing all this tech was as streamlined as, say, using a CRM like zohocrm for client interactions. Seriously, getting that audio driver working is proving way more complicated than I anticipated.
Back to troubleshooting the Realtek driver…Ugh.
These often provide optimized performance for that specific hardware. Generic drivers, such as those offered by Microsoft, are another option. While less feature-rich, they usually offer broad compatibility and stability. Finally, there are third-party audio enhancement suites that offer advanced features but may have compatibility issues or performance overhead. Each of these options carries its own set of advantages and disadvantages.
Advantages and Disadvantages of Using Alternative Audio Drivers
Using an alternative driver can offer several benefits, such as improved sound quality, enhanced features (like virtual surround sound or advanced equalization options), and resolving compatibility issues with specific applications or games. However, using an alternative also presents potential downsides. You might experience driver instability, conflicts with other software, or even a decrease in performance compared to the original driver.
The installation process can also be more complex and may require additional troubleshooting steps. Always back up your system before installing any new driver to allow for a quick rollback if issues arise. Thoroughly research compatibility before installation to avoid unexpected complications.
Security Considerations
Outdated or compromised Realtek audio drivers present a significant security vulnerability on your Windows 11 system. These vulnerabilities can be exploited by malicious actors to gain unauthorized access, install malware, or even remotely control your computer. Think of it like leaving your front door unlocked – it’s an open invitation for trouble.Keeping your Realtek audio drivers updated is crucial for maintaining the security of your system.
Updated drivers often include security patches that address known vulnerabilities, preventing attackers from exploiting weaknesses in the software. Neglecting updates leaves your system exposed to potential threats, increasing the risk of data breaches, system instability, and other security issues.
Driver Update Procedures for Enhanced Security
Regularly updating your Realtek audio drivers is paramount for minimizing security risks. This involves checking for updates through the Realtek website, using Windows Update, or employing dedicated driver update utilities. Always download drivers from trusted sources to avoid inadvertently installing malicious software disguised as legitimate drivers. Before installing any update, it’s a good idea to back up your system to ensure you can revert if issues arise.
A simple system restore point will often suffice.
Identifying and Addressing Compromised Drivers
Signs of a compromised Realtek audio driver might include unusual system behavior, such as unexpected crashes, unusually high CPU usage, or the appearance of unknown processes in Task Manager. If you suspect a compromise, immediately disconnect from the internet to limit potential damage. Run a full system scan with a reputable antivirus program and consider using a malware removal tool.
Reinstalling the driver from a trusted source after a complete system scan is the recommended next step. If the problems persist, a clean Windows installation might be necessary.
Best Practices for Secure Driver Management
Implementing a proactive approach to driver management is essential for maintaining a secure computing environment. This includes regularly checking for updates, only downloading drivers from official sources (like the Realtek website or Windows Update), and using a reputable antivirus program with real-time protection. Regularly backing up your system is crucial as a safety net in case of driver installation problems or malware infections.
Finally, keeping your operating system and other software up-to-date reduces the overall attack surface and strengthens the system’s overall security posture. Think of it as a layered defense strategy.
Ultimate Conclusion
So there you have it—a comprehensive look at conquering your Realtek audio woes on Windows 11. From simple installations to advanced troubleshooting, we’ve covered the gamut. Remember, keeping your drivers updated is key, and don’t hesitate to explore the Realtek Audio Console for customization options. If you’re still struggling, remember there are always alternative drivers out there. Happy listening!
FAQ Section
What if the Realtek Audio Console isn’t showing up?
Try restarting your computer. If that doesn’t work, check your Device Manager to ensure the Realtek audio driver is properly installed and enabled. You might need to reinstall the driver.
My sound is super quiet, even at max volume. What gives?
Check your Windows volume mixer to make sure the volume isn’t muted or turned down for specific apps. Also, look at the volume controls within the Realtek Audio Console itself; sometimes there are separate volume settings there. You might also have a problem with your speakers or headphones.
Can I use a different audio driver instead of Realtek?
Totally! There are other audio drivers available, but using a non-Realtek driver might mean losing some of the advanced features of the Realtek Audio Console. Proceed with caution and make sure you get the driver from a reputable source.
How do I know if my Realtek drivers are up-to-date?
Check the Realtek website for the latest version. You can also use Windows Update, but sometimes it lags behind. Device Manager will show you the current driver version, which you can compare to the latest version on the Realtek site.
What should I do if I accidentally deleted the Realtek driver?
Don’t panic! Just download the latest driver from the Realtek website and reinstall it. Make sure to restart your computer after installation.
