Win32 Disk Imager, that trusty little utility, is your gateway to the world of disk imaging. Whether you’re a seasoned tech pro or a curious college student, understanding its power unlocks a whole new level of control over your data. From creating backups to troubleshooting operating system issues, Win32 Disk Imager simplifies tasks that would otherwise be incredibly complex.
Table of Contents
This guide will walk you through everything you need to know to master this essential tool.
We’ll cover the basics of creating and restoring disk images, exploring the various file formats it supports and delving into more advanced techniques like creating bootable USB drives and even forensic images. We’ll also address potential pitfalls, offering solutions to common problems and emphasizing best practices for security and efficiency. Get ready to become a Win32 Disk Imager expert!
Win32 Disk Imager Functionality

Win32 Disk Imager is a lightweight, free, and open-source utility that lets you create and restore disk images. Think of it as a digital clone of your storage device. It’s incredibly useful for backing up drives, creating bootable USB drives, and generally working with disk image files, which are essentially exact copies of a hard drive or other storage media.
It’s a go-to tool for anyone working with system images or needing to quickly copy a drive’s contents.Win32 Disk Imager’s core function is the ability to write and read disk images to and from physical storage devices. This means you can create a perfect copy of a hard drive, USB drive, or SD card, and then later restore that copy to another device.
The program supports various image formats, including IMG, DD, and others, making it versatile and compatible with a range of tools and systems. The simplicity of its interface belies its power; it’s surprisingly effective for a program with such a small footprint.
Creating a Disk Image Using Win32 Disk Imager
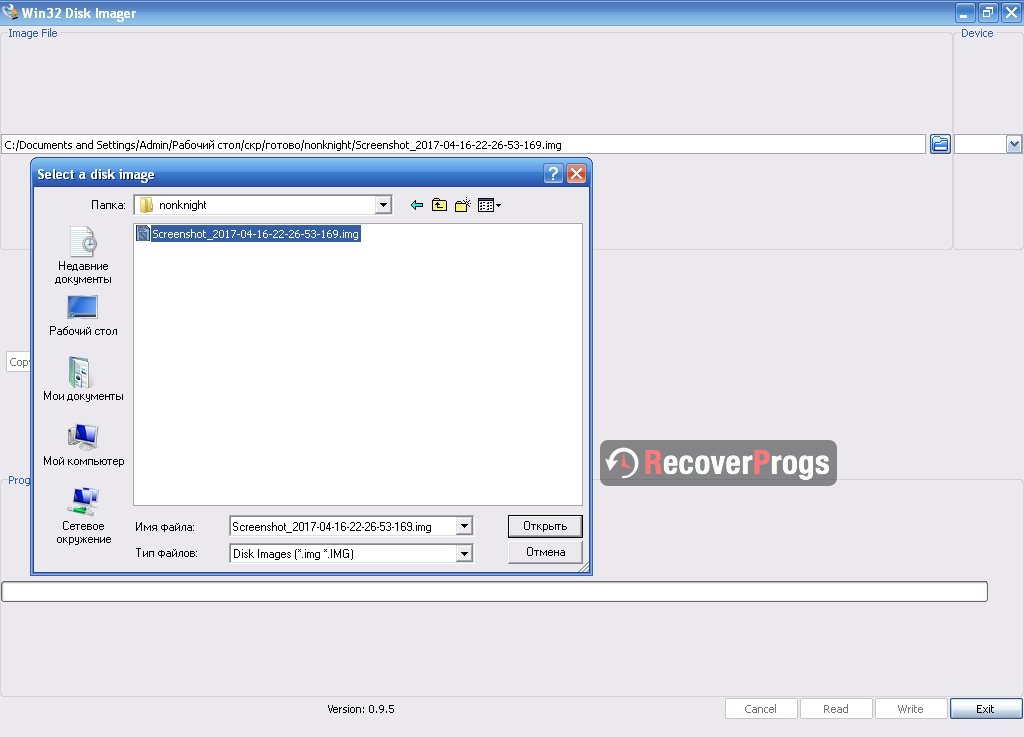
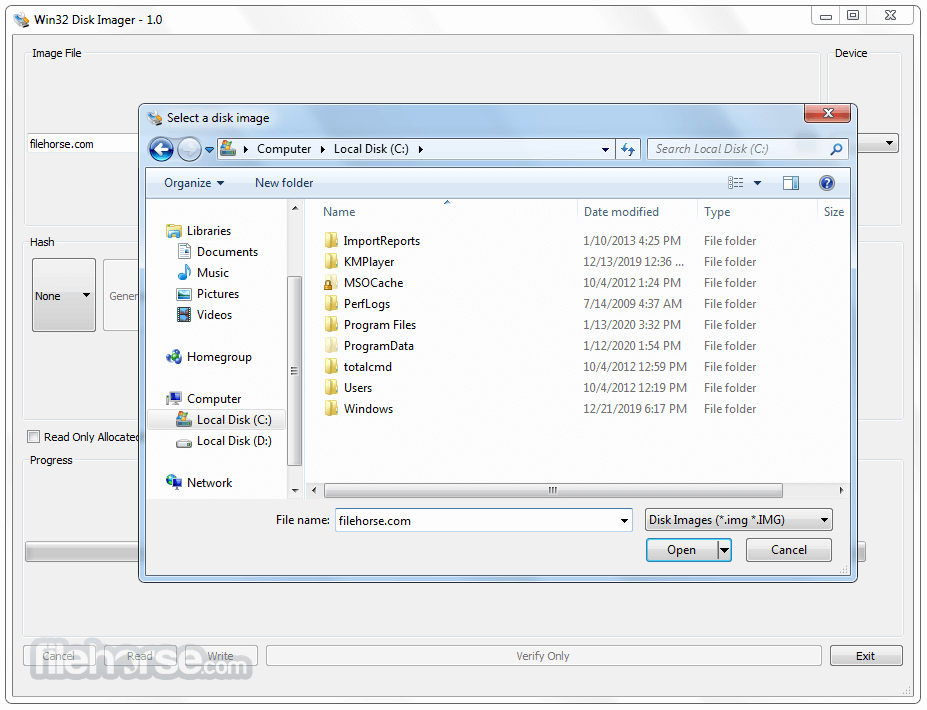
Creating a disk image is straightforward. First, select the drive you want to image. Crucially, double-check this step; selecting the wrong drive can lead to data loss. Next, specify the location and filename for the output image file. Win32 Disk Imager will then create a bit-for-bit copy of the selected drive, saving it as the specified image file.
This process can take a significant amount of time, depending on the size of the drive being imaged. For example, imaging a 1TB hard drive will naturally take much longer than imaging a 16GB USB drive. Once the process is complete, you’ll have a perfect digital replica of your source drive, ready for storage or later restoration.
Restoring a Disk Image with Win32 Disk Imager
Restoring a disk image is just as easy. Begin by selecting the target drive where you want to write the image. Again, this is a critical step; incorrect selection could erase data. Next, browse to and select the image file you want to restore. Win32 Disk Imager will then write the contents of the image file to the selected drive, effectively restoring the drive to its state at the time the image was created.
The process will overwrite any existing data on the target drive, so exercise caution. As with creating an image, the time required for restoration depends on the size of the image file.
Common Use Cases for Win32 Disk Imager
Win32 Disk Imager finds application in several scenarios. It’s frequently used to create bootable USB drives from ISO images of operating systems like Linux distributions. This allows users to easily install or test different operating systems without needing to burn a CD or DVD. Another common use is to create backups of entire hard drives, ensuring data preservation in case of hardware failure.
Furthermore, forensic investigators sometimes use it to create forensic images of drives for analysis, preserving the original data’s integrity. Finally, it’s also useful for creating exact copies of SD cards, particularly beneficial for those working with embedded systems or single-board computers.
Supported File Formats
Win32 Disk Imager, despite its somewhat dated interface, is a surprisingly versatile tool for creating and restoring disk images. Its simplicity belies its ability to handle a variety of image formats, each with its own strengths and weaknesses. Understanding these differences is key to choosing the right format for your specific needs. This section will explore the supported formats, highlighting their key characteristics.
Win32 Disk Imager primarily supports two main image file formats: raw disk images and IMG files. While it might handle other formats depending on the file extension, these are the ones reliably and consistently supported for both creation and restoration. Let’s delve into the specifics of each.
So, Win32 Disk Imager is great for cloning drives, right? But managing all those image creation and deployment tasks? That’s where solid project management comes in. You could totally use something like jira project management to track versions, deadlines, and even assign tasks for different team members working on those disk images. Then, back to Win32 Disk Imager – you’d have a super organized workflow for all your imaging needs!
Raw Disk Images
Raw disk images are essentially bit-for-bit copies of a disk’s contents. They are typically identified by extensions like .dd, .img, or .raw, although the extension is often less important than the actual file content. These images contain no metadata or information about the file system; they’re simply a direct representation of the sectors on the disk. This simplicity is both a strength and a weakness.
The advantage of raw images is their fidelity. They provide an exact replica of the source disk, ensuring that everything, including potentially hidden data or unusual partition structures, is preserved. This makes them ideal for forensic imaging or when complete accuracy is paramount. However, this fidelity also translates to larger file sizes compared to other formats. Furthermore, because they lack metadata, tools other than Win32 Disk Imager may have difficulty working with them directly.
You might need additional utilities to mount or explore the contents.
IMG Files
IMG files, while also often used for raw disk images, can sometimes contain additional metadata or be formatted differently depending on their origin. The term “IMG” is fairly generic, and the actual content can vary. In the context of Win32 Disk Imager, it’s usually treated similarly to raw images, but there might be instances where minor inconsistencies arise.
The advantages and disadvantages largely mirror those of raw images. The fidelity is generally high, though not guaranteed to be as absolute as a strictly raw image. File sizes are typically large. However, the less-defined nature of IMG files compared to explicitly-labeled raw images could introduce some unexpected behavior or compatibility issues in some less common scenarios.
Again, additional tools might be needed for more in-depth analysis or manipulation.
System Requirements and Compatibility
Win32 Disk Imager is a lightweight tool, so its system requirements are pretty modest. You don’t need a powerhouse computer to run it effectively. However, understanding the minimum specs and potential compatibility issues will ensure a smooth imaging experience. This section details those requirements and compatibility across different Windows versions.
Minimum System Requirements
To run Win32 Disk Imager, you’ll need a system that meets these basic requirements. These specifications represent the bare minimum for successful operation; better specs will certainly lead to faster processing times, especially when working with larger image files. It’s important to note that these are just guidelines, and your mileage may vary depending on your specific hardware and the size of the disk image you’re working with.
Generally, you’ll need a computer with at least a 1 GHz processor, 512 MB of RAM, and sufficient free hard drive space to store the disk image file. Having a reasonably modern system will significantly improve the user experience.
Operating System Compatibility
Win32 Disk Imager is primarily designed for Windows operating systems. While it might technically run on other systems through emulation, its native functionality is limited to the Windows environment. Compatibility issues can arise from outdated drivers or conflicting software. Using the latest version of Win32 Disk Imager is crucial to mitigate potential problems.
Windows Version Compatibility
The following table summarizes Win32 Disk Imager’s compatibility with various Windows versions. While it generally works across a wide range of Windows versions, older systems might require additional steps or may experience slower performance. Always ensure you’re using a compatible version of the application for your operating system.
| Windows Version | Compatibility | Notes | Potential Issues |
|---|---|---|---|
| Windows 11 | Excellent | Generally runs smoothly. | None typically reported. |
| Windows 10 | Excellent | Widely tested and supported. | Rarely encountered issues. |
| Windows 8.1 | Good | Functional, but may require administrative privileges. | Potential driver conflicts are possible. |
| Windows 7 | Fair | May require compatibility mode or updates. | Performance may be slower than on newer systems; some features may not be fully supported. |
Error Handling and Troubleshooting
Win32 Disk Imager, while generally reliable, can sometimes throw errors. Understanding these errors and how to troubleshoot them is crucial for a smooth imaging experience. This section will cover common issues, their causes, and effective solutions. Proper troubleshooting will save you time and prevent data loss.
Many errors stem from simple mistakes, like selecting the wrong drive or using a corrupted image file. Others can be more complex, requiring deeper investigation. Let’s explore some of the most frequently encountered problems.
Common Errors and Solutions
This section details some of the most frequently reported errors encountered when using Win32 Disk Imager and provides solutions for resolving them. Addressing these issues proactively can prevent significant headaches.
Below is a table summarizing common errors, their likely causes, and suggested solutions. Remember to always double-check your work before proceeding with any disk imaging operation.
| Error Message (or Symptom) | Likely Cause | Solution |
|---|---|---|
| “The disk is write-protected” | The target drive is write-protected, either through a physical switch or software settings. | Remove any write-protection, either by physically switching the drive’s write-protect switch (if present) or by changing relevant settings in your operating system’s disk management utility. |
| “Access is denied” | Insufficient permissions to access the target drive or image file, or the drive is in use by another program. | Ensure you have administrator privileges. Close any applications that might be accessing the target drive. Try running Win32 Disk Imager as administrator. |
| Image creation/restoration fails with no specific error message. | Corrupted image file, faulty USB drive, or insufficient disk space on the target drive. | Verify the integrity of the image file by trying it with a different imaging tool. Check the target drive for errors using your operating system’s disk utility. Ensure sufficient free space on the target drive. |
| “Invalid disk image file” | The selected image file is corrupted or not in a supported format. | Download the image file again from a trusted source. Verify the file extension matches a supported format. |
| Incorrect drive selection | Selecting the wrong drive in Win32 Disk Imager can lead to data loss. | Carefully verify the drive letter selected in Win32 Disk Imager matches the intended target drive. Double and triple-check before proceeding. Consider using a smaller test image to avoid catastrophic errors. |
Troubleshooting Guide for Image Creation
Creating a disk image successfully requires careful attention to detail. This section offers a step-by-step approach to troubleshoot issues that may arise during image creation.
Follow these steps systematically to identify and resolve problems encountered during the image creation process. Remember, data loss is a real possibility if mistakes are made.
- Verify the source drive is correctly connected and detected by your system.
- Ensure sufficient free space on your target storage location (e.g., hard drive, external drive).
- Double-check that you have selected the correct source and destination drives in Win32 Disk Imager.
- Confirm that the selected image file type is supported by Win32 Disk Imager (e.g., .img, .dd).
- Restart your computer and try again. Sometimes a simple restart can resolve temporary software glitches.
- If the problem persists, try using a different USB port or cable.
- Consider using a different imaging tool to rule out problems specific to Win32 Disk Imager.
Troubleshooting Guide for Image Restoration
Restoring a disk image is equally crucial and prone to errors. This section guides you through resolving common issues during the image restoration process.
These steps provide a structured approach to troubleshooting restoration problems, minimizing the risk of data loss or system instability.
- Verify that the image file is not corrupted. Try restoring it using a different imaging tool.
- Ensure the target drive is correctly connected and detected by your system.
- Confirm that the target drive is large enough to accommodate the image file.
- Double-check that you have selected the correct image file and target drive in Win32 Disk Imager.
- Ensure the target drive is properly formatted (if necessary) before restoration.
- Check for any write-protection settings on the target drive and disable them if necessary.
- If the restoration fails, try using a different USB port or cable.
Security Considerations
Disk imaging, while incredibly useful for backups and system cloning, introduces several security vulnerabilities if not handled carefully. Creating and managing disk images requires a thoughtful approach to data protection to prevent unauthorized access and maintain data integrity. Ignoring these considerations can lead to significant data breaches or system compromise.Disk images, essentially perfect copies of a storage device, contain all the data present on the original drive, including sensitive information like passwords, personal files, and system configurations.
This makes them prime targets for malicious actors. Compromised images can be used to restore a system to a vulnerable state, or the data within can be extracted and misused. Furthermore, the process of creating and transferring these images presents opportunities for interception or manipulation.
Potential Security Risks Associated with Disk Imaging Software
The inherent nature of disk imaging creates several security risks. Improperly secured images are vulnerable to theft, unauthorized access, and data breaches. For instance, an image left unprotected on a network share could be easily accessed by anyone with network access. Similarly, a physical drive containing an image could be stolen, leading to data exposure. Furthermore, vulnerabilities within the imaging software itself could be exploited by attackers to gain unauthorized access to the image or the system creating the image.
The use of weak or easily guessed passwords to protect the images is another major vulnerability.
Best Practices for Securing Disk Images
Strong encryption is paramount. Employing strong encryption algorithms, such as AES-256, ensures that even if an image is compromised, the data remains inaccessible without the correct decryption key. This encryption should be applied both during the imaging process and during storage. The encryption key itself should be securely stored, ideally using a hardware security module (HSM) or a robust key management system.
Additionally, access control mechanisms should be implemented to limit access to the disk images to only authorized personnel. This might involve using access control lists (ACLs) or other security measures to restrict access based on user roles and permissions. Regular updates to the imaging software are crucial to patch any known security vulnerabilities.
Protecting Against Unauthorized Access to Disk Images
Multiple layers of security are needed to effectively protect disk images. These include strong passwords or passphrase protection for encrypted images, secure storage locations (e.g., encrypted network shares or dedicated, physically secured servers), and the use of digital signatures to verify the integrity and authenticity of the images. Regular backups of the encryption keys are essential, but these backups should also be secured with robust protection measures.
Consider using a dedicated, secure storage device, such as a hardware-encrypted drive, for storing the disk images and their associated encryption keys. Implementing a robust incident response plan will help mitigate the impact of a security breach. This plan should Artikel procedures for detecting, containing, and recovering from a security incident involving compromised disk images. Finally, regular security audits should be performed to assess the effectiveness of security controls and identify any vulnerabilities.
Alternatives to Win32 Disk Imager
Win32 Disk Imager is a solid, lightweight tool, but it’s not the only game in town when it comes to disk imaging. Several other applications offer similar or enhanced functionality, catering to different needs and skill levels. Choosing the right tool depends on your specific requirements and comfort level with technical software.
This section explores three popular alternatives to Win32 Disk Imager, comparing their features and capabilities to help you decide which might be a better fit for your workflow.
Comparison of Disk Imaging Tools
The following table compares Win32 Disk Imager with three popular alternatives: Rufus, Etcher, and Clonezilla. The comparison focuses on key features relevant to typical user needs.
| Feature | Win32 Disk Imager | Rufus | Etcher | Clonezilla |
|---|---|---|---|---|
| Primary Function | Creating disk images (writing .img files to drives) | Creating bootable USB drives, formatting drives, and low-level disk operations | Creating bootable USB drives from image files (primarily .img, .iso) | Cloning and imaging hard drives and partitions |
| Supported Image Formats | .img, .dd | .iso, .img, .zip, and more | .img, .iso, .zip, .dmg, and more | Various formats, including its own proprietary format |
| Ease of Use | Simple and straightforward interface; good for beginners | Relatively easy to use, with a clear interface | Very user-friendly, with a clean and intuitive design | Steeper learning curve; more advanced options require technical knowledge |
| Advanced Features | Limited advanced features | Supports advanced options like partitioning schemes and file system selection | Verification feature to ensure image integrity | Offers full disk cloning, partitioning, and image manipulation capabilities |
| Operating System Support | Windows | Windows | Windows, macOS, Linux | Multiple operating systems (can be run from a bootable USB drive) |
| Open Source | No | No | Yes | Yes |
As you can see, each tool has its strengths and weaknesses. Win32 Disk Imager excels in its simplicity, but lacks advanced features. Rufus offers more control over the process, while Etcher prioritizes ease of use and image verification. Clonezilla, on the other hand, is a powerful tool for comprehensive disk management but demands a higher level of technical expertise.
Advanced Usage Scenarios
Win32 Disk Imager, while seemingly simple, packs a punch when it comes to advanced disk manipulation. Beyond basic image writing, it’s a surprisingly versatile tool for tasks like creating bootable USB drives, cloning hard drives, and even generating forensic disk images. Let’s delve into some of these more complex applications.
Creating Bootable USB Drives
Creating a bootable USB drive with Win32 Disk Imager involves selecting the correct ISO image file and ensuring the target USB drive is properly identified. First, you’ll need an ISO image of a bootable operating system, like a Linux distribution or a Windows installation media. Then, launch Win32 Disk Imager. In the “Image File” field, browse and select your ISO file.
Next, carefully choose the correct drive letter representing your USB drive from the “Device” dropdown menu. Double-check this step; selecting the wrong drive can lead to data loss. Once confirmed, click “Write” and wait for the process to complete. The resulting USB drive will be bootable, allowing you to boot from it on a computer. It’s crucial to remember that this process will erase all existing data on the selected drive.
Cloning a Hard Drive
Win32 Disk Imager can create an exact copy, or clone, of a hard drive. This is useful for backing up your entire system or for creating an identical copy for testing or forensic analysis. To clone a hard drive, you’ll need a target drive with at least the same capacity as the source drive. In Win32 Disk Imager, specify the source drive in the “Device” field and the destination drive in the “Image File” field.
This is counterintuitive to the typical usage, but this is how Win32 Disk Imager handles creating a drive image to a file. The “Image File” field will act as the location of the cloned drive. Click “Write,” and the process will begin. This process can take a significant amount of time depending on the size of the drive.
Again, ensure you’ve selected the correct source and destination drives to avoid irreversible data loss.
Creating a Forensic Image, Win32 disk imager
Win32 Disk Imager can be used in forensic investigations to create a bit-by-bit copy of a hard drive or other storage device. This ensures that the original evidence remains untouched while a working copy is available for analysis. The process is similar to cloning, but with a crucial difference: you must use a write-blocking device to prevent accidental modification of the original drive during the imaging process.
A write-blocking device prevents any data from being written to the source drive, preserving its integrity. In Win32 Disk Imager, select the forensic drive as the source device and the destination location (often a large external drive) as the image file. The resulting image file will be a perfect, unalterable copy of the original drive, suitable for forensic analysis.
The use of hashing algorithms to verify the integrity of the created image is highly recommended after the process completes.
Command-Line Interface (if applicable)
Win32 Disk Imager, unfortunately, doesn’t offer a command-line interface. It’s a purely graphical application designed for ease of use through its intuitive visual interface. This means there are no command-line options available for creating or restoring disk images using Win32 Disk Imager directly. Any automation or scripting would require using a different imaging tool with command-line capabilities.This limitation might be seen as a drawback for users who prefer or require automated disk imaging tasks within scripts or batch processes.
Many other disk imaging tools provide robust command-line functionalities, allowing for greater flexibility in system administration and deployment scenarios. The absence of a CLI in Win32 Disk Imager emphasizes its focus on a user-friendly GUI experience rather than advanced scripting or automation.
Alternatives with Command-Line Support
Several alternative disk imaging tools provide comprehensive command-line interfaces, offering functionalities similar to Win32 Disk Imager but with the added benefit of automation. These alternatives allow for the creation and restoration of disk images from the command prompt, integrating seamlessly into automated scripts or batch files. This is particularly useful for system administrators managing large numbers of systems or requiring repeatable, automated imaging processes.
Examples include tools like `dd` (a powerful but potentially destructive utility found on most Unix-like systems), `imager` (a more user-friendly command-line tool), and various other specialized imaging utilities available for different operating systems. The specific features and syntax vary depending on the chosen tool.
Legal and Licensing Aspects
Win32 Disk Imager’s licensing and legal implications are crucial for understanding its proper use. This section clarifies the software’s licensing terms and explores the legal ramifications associated with various applications. Understanding these aspects ensures responsible and compliant use of the tool.The licensing of Win32 Disk Imager falls under the GNU General Public License (GPL). This is a widely used open-source license that grants users certain freedoms and imposes certain obligations.
Specifically, the GPL permits users to freely use, modify, and distribute the software, provided they comply with the license’s terms. These terms primarily involve also releasing any modifications under the same GPL license, ensuring the open-source nature of the project is maintained.
GNU General Public License Implications
The GPL’s “copyleft” nature means that any derivative works (modifications or enhancements) must also be licensed under the GPL. This ensures that the software remains free and open-source, preventing its privatization or restriction. Users who modify Win32 Disk Imager and redistribute it must make their changes available under the same license. Failure to comply with these terms can lead to legal action from the copyright holders.
The GPL also includes provisions regarding warranty disclaimers and liability limitations, meaning users generally utilize the software “as is” without express warranties of functionality or performance.
Legal Implications of Usage
The legality of using Win32 Disk Imager depends entirely on the intended purpose and adherence to relevant laws. For example, creating an image of a copyrighted operating system without proper authorization is a violation of copyright law. Similarly, using the software to create and distribute images containing illegal or malicious software is a violation of numerous laws. Conversely, creating images of personal data for backup or system restoration is generally legal and a legitimate use of the software.
Ethical considerations are also paramount; creating unauthorized copies of software or data is unethical even if not explicitly illegal.
Software Copyright and Distribution
Win32 Disk Imager itself is covered by copyright. The GPL license grants specific permissions, but it doesn’t remove the underlying copyright. Unauthorized modification or distribution of the software, especially for commercial gain without adhering to the GPL’s requirements, would be a copyright infringement. The software’s copyright holders retain ownership and control over the intellectual property rights. Proper attribution is expected when distributing modified versions of the software, as Artikeld in the GPL.
Best Practices for Using Win32 Disk Imager

Win32 Disk Imager is a powerful tool, but like any powerful tool, using it effectively requires understanding best practices. Proper technique ensures successful image creation and restoration, minimizing the risk of data loss or corruption. This section Artikels key strategies for optimizing your use of Win32 Disk Imager across various scenarios.
Image File Management
Effective management of your disk images is crucial. Organize your images using a clear and consistent naming convention. For example, use a format like `YYYYMMDD_Description_Source.img` (e.g., `20241027_Windows10_LaptopA.img`). This makes it easy to identify the image’s creation date, contents, and source. Store your images in a location with sufficient storage space and reliable backups.
Consider using external hard drives or cloud storage for redundancy. Regularly verify the integrity of your stored images using checksum tools like MD5 or SHA-256 to ensure they haven’t been corrupted.
Optimizing for Different Scenarios
Win32 Disk Imager’s utility varies depending on the task. When creating images of operating system installations, ensure the target drive is completely erased beforehand to avoid conflicts. For creating images of data drives, consider using compression techniques (if supported by the image format) to reduce storage space. When restoring images, verify the target drive’s size matches the image size to avoid errors.
Remember to always double-check the selected drive letter before initiating any write operation to prevent accidental data loss on the wrong drive.
Checklist for Successful Image Creation and Restoration
Before embarking on either image creation or restoration, a comprehensive checklist minimizes the chances of errors. This systematic approach safeguards your data and ensures a smooth process.
- Backup Existing Data: Always back up any data on the target drive before creating or restoring an image. This is the most crucial step, as it prevents irreversible data loss.
- Verify Drive Selection: Double, even triple-check the selected drive letter in Win32 Disk Imager to ensure you’re working with the correct drive. A simple mistake here can lead to catastrophic data loss.
- Correct Image Format: Choose the appropriate image format (e.g., .img, .dd) based on your needs and compatibility with your target system. Ensure your target system supports the chosen format.
- Sufficient Disk Space: Ensure your target drive has enough free space for the image being written. Insufficient space will halt the process and potentially corrupt the image.
- Stable Power Supply: Maintain a stable power supply during the entire image creation or restoration process to prevent interruptions that can lead to data corruption.
- Verify Image Integrity (Post-Process): After creating or restoring an image, verify its integrity using checksum tools. This helps detect any corruption that may have occurred during the process.
Summary: Win32 Disk Imager
So, there you have it – a comprehensive look at Win32 Disk Imager. From its straightforward interface to its powerful capabilities, this tool is a must-have for anyone who works with computers. Remember to always prioritize data security and follow best practices to avoid potential issues. With a little practice, you’ll be creating, restoring, and managing disk images like a pro in no time.
Now go forth and conquer your digital world!
Commonly Asked Questions
Can I use Win32 Disk Imager on a Mac?
Nope, Win32 Disk Imager is specifically designed for Windows.
What happens if I interrupt the imaging process?
It’s a bad idea! Interrupting can corrupt your image file, rendering it unusable. Let the process complete without interruption.
Is Win32 Disk Imager free to use?
Yes, it’s open-source and freeware.
How big of a drive can I image?
Theoretically, it can handle drives of any size, but practically, it depends on your system’s available RAM and storage space.
What if my image file is corrupted?
Unfortunately, there’s no guaranteed fix. Try creating a new image from the source drive. If that fails, your data might be lost.
