MiniTool Partition Wizard isn’t just another disk management tool; it’s your all-access pass to mastering your hard drive. Whether you’re a seasoned techie or a curious newbie, this software packs a serious punch, offering everything from basic partitioning to advanced data recovery. We’ll explore its features, from creating and resizing partitions to cloning drives and recovering lost data, making sure you’re fully equipped to handle any hard drive challenge.
Table of Contents
This guide will cover the core functionalities of MiniTool Partition Wizard, comparing its different editions (Free, Pro, etc.) and highlighting its strengths and weaknesses compared to competitors. We’ll walk you through practical tasks like creating partitions, resizing them, and even recovering lost data. We’ll also delve into more advanced features like disk cloning, bootable media creation, and file system management, explaining the process step-by-step and highlighting potential pitfalls to avoid.
MiniTool Partition Wizard Overview
MiniTool Partition Wizard is a popular disk partitioning tool that allows users to manage their hard drives and partitions with relative ease. It offers a range of features, from basic tasks like creating and deleting partitions to more advanced operations like migrating operating systems and recovering lost partitions. Whether you’re a seasoned techie or a casual user, this software aims to provide a user-friendly interface for managing your storage space effectively.MiniTool Partition Wizard provides a comprehensive suite of tools for managing hard drives and partitions.
Its core functionalities include creating, deleting, formatting, and resizing partitions; converting between different file systems (like NTFS and FAT32); copying disks and partitions; migrating operating systems to new drives; and recovering lost or damaged partitions. The software supports various storage devices, including HDDs, SSDs, and USB drives. Its intuitive interface makes even complex tasks relatively straightforward.
MiniTool Partition Wizard Editions and Feature Sets
The software is available in several editions, each offering a different set of features. The free edition provides access to the most commonly used functions, such as creating, deleting, and formatting partitions, while the paid versions, like Pro and Pro Ultimate, unlock advanced features. The Pro version adds support for more complex operations, such as migrating the operating system and recovering lost partitions.
The Pro Ultimate edition includes all the features of the Pro version, plus additional tools for data recovery and disk cloning. The differences in functionality between editions are primarily centered around advanced capabilities and the level of support provided. A user should consider their specific needs when choosing the appropriate edition.
Comparison with Other Disk Partitioning Software
MiniTool Partition Wizard competes with other popular disk partitioning tools such as EaseUS Partition Master and AOMEI Partition Assistant. While all three offer similar core functionalities, there are subtle differences in their user interfaces, feature sets, and pricing. For example, EaseUS Partition Master is known for its user-friendly interface, while AOMEI Partition Assistant is often praised for its extensive range of advanced features.
MiniTool Partition Wizard aims to strike a balance between ease of use and comprehensive functionality, making it a strong contender in the market. The best choice for a user depends on their specific technical expertise and the complexity of tasks they need to perform. Direct comparisons based on specific feature sets and benchmarks would provide a more detailed analysis.
Partition Management Tasks

Okay, so you’ve got MiniTool Partition Wizard fired up and you’re ready to wrangle your hard drive’s partitions. Let’s dive into the nitty-gritty of managing those digital real estate parcels. We’ll cover creating, resizing, moving, and deleting partitions – the essential moves for keeping your storage organized and efficient.
Creating New Partitions
Creating a new partition is like carving out a new space on your hard drive for a specific purpose – maybe a dedicated area for games, or a separate home for your operating system. MiniTool Partition Wizard makes this pretty straightforward. You’ll typically select the “Unallocated space” on your hard drive, choose “Create” from the menu, and then specify the size and drive letter for your new partition.
You’ll also need to select a file system (like NTFS or FAT32) – this determines how your computer interacts with the data on that partition. Remember to choose a partition type carefully based on your needs.
| Partition Type | Description | Limitations |
|---|---|---|
| Primary | Can hold an operating system. A hard drive can only have up to four primary partitions. | Limited number per drive. |
| Logical | Cannot hold an operating system. Resides within an extended partition. | Requires an extended partition to exist first. |
| Extended | Container for logical partitions. A hard drive can only have one extended partition. | Only holds logical partitions, not the OS. |
Resizing or Moving Existing Partitions
Need more space for your ever-growing library of cat videos? Or maybe you want to reorganize your hard drive for better performance? Resizing or moving partitions lets you adjust the allocated space. In MiniTool Partition Wizard, you’ll typically select the partition you want to modify, choose “Resize/Move,” and then drag the partition boundaries to your desired size and location.
Be careful when doing this; incorrect resizing can lead to data loss. Always back up your important data before attempting this.
Deleting Partitions
Deleting a partition is a pretty permanent action, so proceed with caution! It’s essentially wiping the data from that specific section of your hard drive. Before deleting a partition, you should:
- Back up all important data from the partition you intend to delete. This is crucial because once deleted, the data is typically unrecoverable.
- Ensure you have selected the correct partition. Mistakes can lead to accidental data loss from an unintended partition.
- Understand the consequences. Deleting a partition is a destructive action that cannot be easily undone.
- Consider alternatives. Instead of deleting, resizing or moving a partition might be a better option if you need more space.
Data Recovery Capabilities
MiniTool Partition Wizard isn’t just about managing partitions; it also offers a surprisingly robust data recovery feature. While not a dedicated data recovery program like Recuva or PhotoRec, it can effectively retrieve lost data from deleted or lost partitions, making it a handy all-in-one tool for many users. Its data recovery capabilities are integrated directly into the main interface, providing a streamlined workflow for users already familiar with the partition management tools.This data recovery functionality works by scanning the selected drive or partition for deleted files and recoverable data.
It leverages a variety of algorithms to identify file signatures and reconstruct lost file structures, increasing the chances of successful recovery. The software presents the recovered data in an easily navigable interface, allowing users to selectively recover specific files or folders.
Lost Partition Recovery Steps, Minitool partition
The process of recovering lost partitions with MiniTool Partition Wizard is relatively straightforward. First, select the drive containing the lost partition. Then, initiate the data recovery process from the main menu. The software will scan the drive, identifying potentially recoverable files. After the scan completes, a list of recoverable files and folders will be displayed, categorized by file type.
Users can then preview files before recovery and select specific items to restore to a designated location, ensuring that the original files are not overwritten. It’s crucial to remember that recovered data should always be saved to a different drive to avoid potential data loss.
Limitations of Data Recovery Functionality
MiniTool Partition Wizard’s data recovery capabilities, while useful, have limitations. The success rate of recovery depends heavily on several factors, including the extent of the data loss, the type of file system used, and the condition of the storage medium. For instance, if the partition was overwritten extensively, recovering data becomes significantly more difficult, if not impossible. Also, severely damaged hard drives may not yield any recoverable data, regardless of the software used.
The software’s ability to recover highly fragmented files might also be limited, resulting in incomplete or corrupted files. Furthermore, while the software attempts to recover a wide range of file types, some specialized or obscure file formats might not be recognized or successfully recovered. Finally, the free version of MiniTool Partition Wizard often has limitations on the amount of data that can be recovered, requiring a paid license for larger recoveries.
Disk Cloning and Imaging: Minitool Partition

MiniTool Partition Wizard offers robust disk cloning and imaging capabilities, essential tools for backing up your data and migrating to new hardware. These features allow for a complete copy of your hard drive, ensuring data preservation and system restoration in case of failure. Understanding the process and available options is crucial for effective data management.Cloning a hard drive involves creating an exact replica of your existing drive onto a new one.
This is particularly useful when upgrading to a larger hard drive or replacing a failing one. MiniTool Partition Wizard streamlines this process, minimizing downtime and data loss risks. Creating a disk image, on the other hand, generates a file containing a complete bit-by-bit copy of your drive. This image can then be used to restore your system to its previous state, acting as a comprehensive backup.
Cloning a Hard Drive with MiniTool Partition Wizard
The process is straightforward. First, select the source drive (the one you’re cloning) and the destination drive (the new drive). Ensure the destination drive has sufficient space and is properly connected. MiniTool Partition Wizard will guide you through the steps, providing clear visual cues. You’ll choose the cloning method (sector-by-sector or partition-by-partition, explained below), and then initiate the cloning process.
The software will handle the copying of all data, partitions, and boot information. Once complete, you can boot from the cloned drive, seamlessly transitioning to your new hardware. It’s important to note that the cloning process may take some time depending on the size of the drive and the speed of the connection.
Creating Disk Images for Backup and Restoration
Creating a disk image is equally simple. Select the drive you want to back up. MiniTool Partition Wizard will prompt you to specify a location and file name for the image file. The software will then create a compressed image file containing a complete copy of your selected drive. This image can be stored on an external drive, network share, or cloud storage.
To restore from the image, simply select the restore option in MiniTool Partition Wizard, choose the image file, and specify the destination drive. The software will then restore the image to the selected drive, bringing your system back to its previous state. Regularly creating disk images is a proactive measure to protect against data loss.
Comparison of Cloning Methods
MiniTool Partition Wizard offers two primary cloning methods: sector-by-sector cloning and partition-by-partition cloning. Sector-by-sector cloning creates a complete, bit-by-bit copy of the entire source drive, including unused space. This method ensures a perfect replica but takes longer and requires a destination drive of equal or greater size. Partition-by-partition cloning only copies the used sectors of the partitions, making it faster and allowing for cloning to a smaller drive, provided the destination drive has enough space for the used partitions.
The choice depends on your needs and priorities. If a perfect replica is paramount, sector-by-sector cloning is preferred. If speed and space optimization are more important, partition-by-partition cloning is the better option. Both methods offer a reliable way to clone your hard drive.
File System Management
MiniTool Partition Wizard offers robust file system management tools, allowing you to optimize your storage and ensure data integrity. Understanding file systems and their capabilities is crucial for efficient disk management. This section will cover converting between file systems, repairing errors, and the implications of different choices.
NTFS to FAT32 Conversion
Converting between NTFS and FAT32 file systems can be necessary for compatibility reasons, particularly when dealing with older devices or operating systems. NTFS, generally preferred for its security and larger file size support, isn’t always compatible with all systems. FAT32, while simpler, has limitations on individual file sizes. MiniTool Partition Wizard simplifies this process. The software guides you through the conversion, warning you about potential data loss if the process is interrupted.
It’s vital to back up your data before undertaking such a conversion. After selecting the partition, you simply choose the target file system (FAT32) and initiate the conversion. The software handles the low-level changes required.
File System Error Checking and Repair
Over time, file systems can become corrupted due to various factors like power outages, software malfunctions, or even physical drive damage. MiniTool Partition Wizard’s file system check feature helps identify and repair these errors. The process involves scanning the selected partition for inconsistencies and attempting to fix them automatically. This process might take some time depending on the partition’s size and the extent of the damage.
The software will provide a report detailing any errors found and the actions taken to resolve them. Regularly running this check can prevent major data loss issues.
Implications of Different File System Choices
The choice between NTFS and FAT32, or other file systems like exFAT, impacts several aspects of your system. NTFS, with its journaling capabilities, offers better data protection against corruption. It also supports larger file sizes and more advanced security features like access control lists (ACLs). FAT32, on the other hand, is simpler, making it compatible with a wider range of devices, but lacks the robust features of NTFS.
ExFAT offers a compromise, supporting larger files than FAT32 while maintaining better compatibility than NTFS across various devices. The best choice depends on your specific needs and the devices you’ll be using the drive with. For example, a USB drive intended for use across various devices (including older ones) might benefit from FAT32, while a system drive would typically use NTFS.
Bootable Media Creation
Creating a bootable USB drive or CD with MiniTool Partition Wizard is a lifesaver when your system’s having a meltdown and you need to troubleshoot or repair it. It essentially lets you create a portable version of the Partition Wizard, allowing you to access and manage your hard drives even if your operating system won’t boot. This is super handy for things like fixing boot errors, recovering data from a crashed drive, or cloning your hard drive.MiniTool Partition Wizard’s bootable media creation process is pretty straightforward.
You’ll first need to download the bootable ISO image from the MiniTool website. Once downloaded, you’ll use a program like Rufus (for Windows) or UNetbootin (for Windows, macOS, and Linux) to write the ISO image to your USB drive or burn it to a CD. The specific steps will vary slightly depending on the tool you use, but the general process involves selecting the ISO image, choosing your target drive (USB or CD), and initiating the writing/burning process.
Remember to back up any important data on the target drive before proceeding, as the process will overwrite existing data.
Creating a Bootable USB Drive or CD
The process involves downloading the MiniTool Partition Wizard bootable ISO image from the official website. After downloading, you’ll use a third-party tool like Rufus (a popular and reliable choice for Windows) to create the bootable media. Rufus presents a simple interface. You select the downloaded ISO file, choose the USB drive as the target device, and then click “Start.” Rufus will format the USB drive and write the ISO image to it, making it bootable.
If using a different tool, consult its documentation for specific instructions. The entire process usually takes a few minutes, depending on the size of the ISO and the speed of your drive. Always double-check that you’ve selected the correct USB drive to avoid accidentally overwriting important data.
Booting from the Created Media
Once your bootable media is ready, you’ll need to configure your computer’s BIOS or UEFI settings to boot from it. This usually involves restarting your computer and pressing a specific key (often Delete, F2, F10, F12, or Esc) during the startup process. The exact key varies depending on your computer’s manufacturer and motherboard. Once in the BIOS/UEFI settings, you’ll need to navigate to the Boot Order section and change the boot priority to your USB drive or CD-ROM drive.
After saving the changes and exiting the BIOS/UEFI, your computer should boot from the bootable media, launching MiniTool Partition Wizard.
Scenarios Requiring Bootable Media
A bootable MiniTool Partition Wizard media is essential in several critical situations. For example, if your operating system fails to boot due to a corrupted boot sector or other boot-related issues, the bootable media provides a way to access and repair your hard drive without relying on a functioning operating system. It’s also invaluable for data recovery if your primary drive crashes or becomes inaccessible.
In scenarios involving hard drive partitioning, cloning, or imaging, a bootable environment is crucial when dealing with system drives that can’t be accessed through the standard Windows interface. For example, imagine needing to clone your entire system drive to a new hard drive; a bootable environment allows this process to occur even if your current system is unstable or experiencing problems.
Finally, it provides a safe and controlled environment for performing potentially risky operations on your hard drive, minimizing the risk of data loss.
Advanced Features
MiniTool Partition Wizard isn’t just for basic partitioning; it packs some seriously powerful features under the hood, perfect for users who need more control over their storage. These advanced options, while potentially very beneficial, also come with a degree of risk if not handled carefully. Understanding their capabilities and limitations is key to successfully leveraging them.This section will delve into some of the more advanced functionalities offered by MiniTool Partition Wizard, including dynamic disk management and RAID support, as well as exploring command-line interface options.
We’ll examine both the potential upsides and the inherent risks associated with using these tools.
Okay, so MiniTool Partition Wizard is seriously useful for managing your hard drive, right? I was actually making a prezi presentation on how to use it for a class, and it helped me visualize the whole partitioning process way better. After that, I went back and actually used MiniTool Partition Wizard to optimize my own laptop’s storage – it’s a game changer.
Dynamic Disk Management
MiniTool Partition Wizard supports dynamic disks, allowing for the creation of volume sets, spanned volumes, striped volumes, and mirrored volumes. This functionality is particularly useful for users needing greater flexibility and fault tolerance. A volume set, for example, combines multiple physical disks to appear as a single logical drive, increasing storage capacity. Spanned volumes also increase capacity, but spread data across multiple disks.
Mirrored volumes provide redundancy, mirroring data across two disks to protect against data loss in case of drive failure. Striped volumes improve performance by striping data across multiple disks, but offer no redundancy. While offering powerful storage management options, improper configuration of dynamic disks can lead to data loss if not performed carefully and with a solid understanding of the implications.
A single error in managing a dynamic disk can render the entire volume inaccessible. It’s crucial to back up your data before undertaking any dynamic disk operations.
RAID Support
MiniTool Partition Wizard offers support for managing basic RAID configurations, allowing users to create and manage RAID arrays. This includes RAID 0 (striping), RAID 1 (mirroring), and potentially others depending on the specific version of the software. RAID 0 improves performance but lacks redundancy. RAID 1 provides redundancy but offers only half the usable storage space of the combined disks.
Using RAID can significantly improve either performance or data protection, but incorrect configuration can lead to data loss and significant downtime. Before attempting any RAID configuration, users should thoroughly understand the implications of each RAID level and ensure their system meets the necessary hardware requirements. Furthermore, RAID isn’t a replacement for regular backups.
Command-Line Interface Options
While the graphical user interface (GUI) is user-friendly, MiniTool Partition Wizard also offers command-line options for more advanced users or for scripting purposes. These command-line options allow for automation and integration with other tools. This functionality is often less intuitive than the GUI, requiring a deeper understanding of the underlying commands and their syntax. The command-line interface provides increased flexibility and control but necessitates a higher level of technical expertise.
Incorrect usage of command-line options can result in unexpected and potentially damaging consequences to your system’s partitions and data. For example, a single typo in a command could lead to unintended partition deletion or formatting. Therefore, it’s highly recommended to carefully review and understand each command before execution, potentially testing on a non-critical system first.
User Interface and Usability

MiniTool Partition Wizard’s usability is a key factor in its overall appeal. While generally intuitive, there’s always room for improvement in the user experience, particularly for users unfamiliar with disk management tools. A clean, efficient interface can significantly reduce the learning curve and increase user confidence when performing potentially data-critical tasks.The software’s navigation and workflow are largely straightforward, but certain aspects could benefit from streamlining.
Understanding the strengths and weaknesses of the UI allows for informed suggestions for improvement and a more comprehensive assessment of the overall user experience.
UI Improvement Suggestion
A significant UI improvement would be the implementation of a visual preview mode before executing any operation. Currently, users rely heavily on textual descriptions and potentially complex diagrams to understand the impact of their actions. A dynamic, interactive preview showing the changes to partitions (sizes, locations, file systems) in real-time before confirmation would drastically reduce the risk of accidental data loss and increase user confidence.
This preview could be a simple graphical representation of the disk, dynamically updating as the user selects and modifies partitions. For instance, if a user is resizing a partition, the preview would visually show the partition shrinking or expanding, clearly indicating the affected space and any potential overlaps. This feature is common in similar software and would greatly enhance usability.
Pros and Cons of User Experience
The user experience of MiniTool Partition Wizard presents both advantages and disadvantages.
Here’s a summary of the pros and cons:
- Pros: Generally intuitive layout; most operations are straightforward; clear (though sometimes dense) help documentation; availability of multiple languages.
- Cons: Potential for accidental data loss due to lack of a robust visual preview; some advanced features might be overwhelming for novice users; the abundance of options can sometimes feel cluttered; certain tooltips and descriptions could benefit from greater clarity.
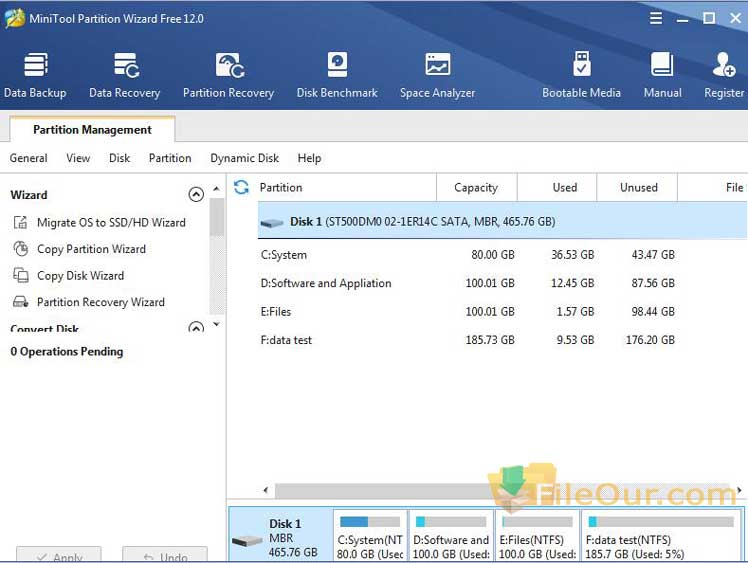
Navigation and Workflow Description
The software’s main window displays a graphical representation of the connected disks and their partitions. Users navigate through the available tools using a menu bar and a sidebar containing commonly used functions. The workflow generally involves selecting a disk or partition, choosing an operation (e.g., resize, format, create), specifying parameters (e.g., size, file system), and confirming the action. A progress bar indicates the operation’s status.
The software offers undo functionality for many operations, providing a safety net against mistakes. However, the lack of a visual preview before confirmation remains a notable drawback. More complex operations, such as disk cloning or bootable media creation, involve a series of steps with specific parameter settings, requiring a more careful and methodical approach. For example, cloning a disk involves selecting the source and destination disks, choosing a cloning method, and confirming the operation.
This process is relatively straightforward, but the lack of a visual representation of the cloning progress beyond a simple progress bar could be improved.
System Requirements and Compatibility
MiniTool Partition Wizard, like any software, has specific system requirements to ensure optimal performance and stability. Understanding these requirements before installation is crucial to avoid compatibility issues and potential problems. This section details the minimum and recommended specifications, supported operating systems and file systems, and potential compatibility concerns with various hardware configurations.Knowing your system’s capabilities helps determine if MiniTool Partition Wizard is right for you.
It’s important to check your system’s specs against the requirements to prevent unexpected errors or crashes during use.
Minimum and Recommended System Requirements
The following table Artikels the minimum and recommended system requirements for running MiniTool Partition Wizard smoothly. Meeting the recommended specifications will generally lead to a more responsive and efficient user experience.
| Specification | Minimum | Recommended |
|---|---|---|
| Operating System | Windows 7/8/8.1/10/11 (32-bit and 64-bit) | Windows 10/11 (64-bit) |
| Processor | 1 GHz or faster processor | 2 GHz or faster processor |
| RAM | 1 GB RAM | 4 GB RAM |
| Hard Disk Space | 100 MB free space | 500 MB free space |
Supported Operating Systems and File Systems
MiniTool Partition Wizard boasts broad compatibility with various Windows operating systems and common file systems. This wide range of support makes it a versatile tool for managing partitions and data across different system setups.MiniTool Partition Wizard directly supports Windows 7, 8, 8.1, 10, and 11 (both 32-bit and 64-bit versions). It’s important to note that the specific features available may vary slightly depending on the operating system version.
For file systems, it supports NTFS, FAT32, exFAT, and other common formats. The ability to handle these diverse file systems allows users to manage partitions containing a wide range of data.
Hardware Compatibility Issues
While MiniTool Partition Wizard is designed for broad compatibility, certain hardware configurations might present challenges. For example, very old or unusual hardware configurations might require additional troubleshooting. Using outdated drivers or having incompatible hardware components could lead to unexpected issues. Generally, systems meeting the minimum requirements should operate without significant problems. Users with older or less powerful hardware might experience slower processing speeds during operations involving large partitions or drives.
However, MiniTool Partition Wizard generally performs well even on systems with modest specs, providing a usable experience even for those with less powerful machines. Significant problems are rare but users with very unusual hardware setups may encounter difficulties.
Ending Remarks
So, whether you’re looking to optimize your storage, recover lost files, or simply understand your hard drive better, MiniTool Partition Wizard is a powerful tool to add to your arsenal. From its intuitive interface to its robust feature set, it offers a comprehensive solution for all your disk management needs. While some advanced features might require a bit of a learning curve, the overall user experience is surprisingly smooth, making it accessible to both beginners and experts alike.
Remember to always back up your data before making any significant changes – a good habit regardless of the software you’re using!
Common Queries
Can I use MiniTool Partition Wizard on a Mac?
Nope, MiniTool Partition Wizard is only available for Windows.
Is it safe to use MiniTool Partition Wizard?
Generally yes, but always back up your data before making any major changes. Proceed with caution, especially when deleting or modifying partitions.
What happens if I run out of space during a partition resize?
The operation will fail. Ensure you have sufficient unallocated space before attempting to resize a partition.
How do I get support if I run into problems?
MiniTool offers various support channels, including their website’s FAQ section and customer support contact information. Check their website for details.
Is the free version limited?
Yes, the free version has limitations compared to the paid versions. Some advanced features and technical support might be unavailable.
